Depending on your Property's configuration, you may be able to access the Activities Menu directly from the Quick Menu.
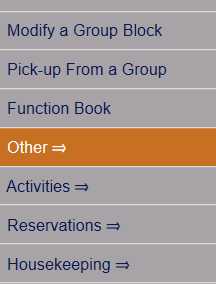
Select Other from the Quick Menu on the left to be taken to the Other Front Desk Tasks Menu.
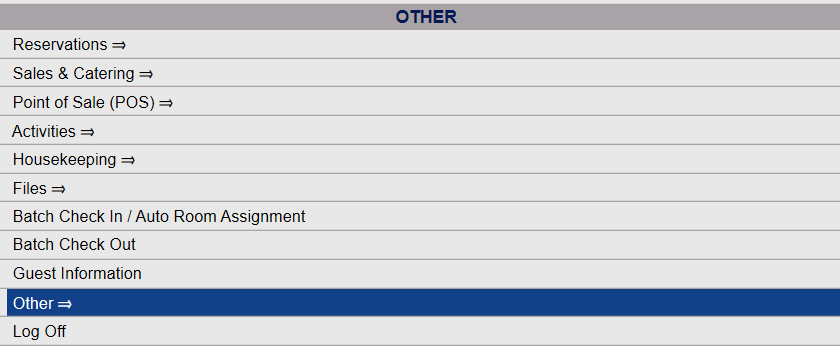
Or select Other => from the Other section (bottom right) of the Full Menu.
Click the icon on the left for the Full menu.
![]()
This will display the Full menu in a tabular form, with four sections, Registration, Status, Cashier and Other.
From the Other Section, select Other =>.
This will display the Other Front Desk Tasks Menu, which has four sections, Other List 1, Other List 2, Documents and Web.
Select Activities from the Other Front Desk Tasks menu, Other List 1 section.
This will open the Activities Menu, which has two sections, Items and Reports.
Select Activity Custom Reports from the Reports section.
When selected, the Query Builder (Activity) screen will open.
Once you are in any Query Builder Screen, the local tool bar allows you to retrieve or save a query. All saved Reports can be accessed from the drop-down list in the "Select Query" option in the local tool bar.
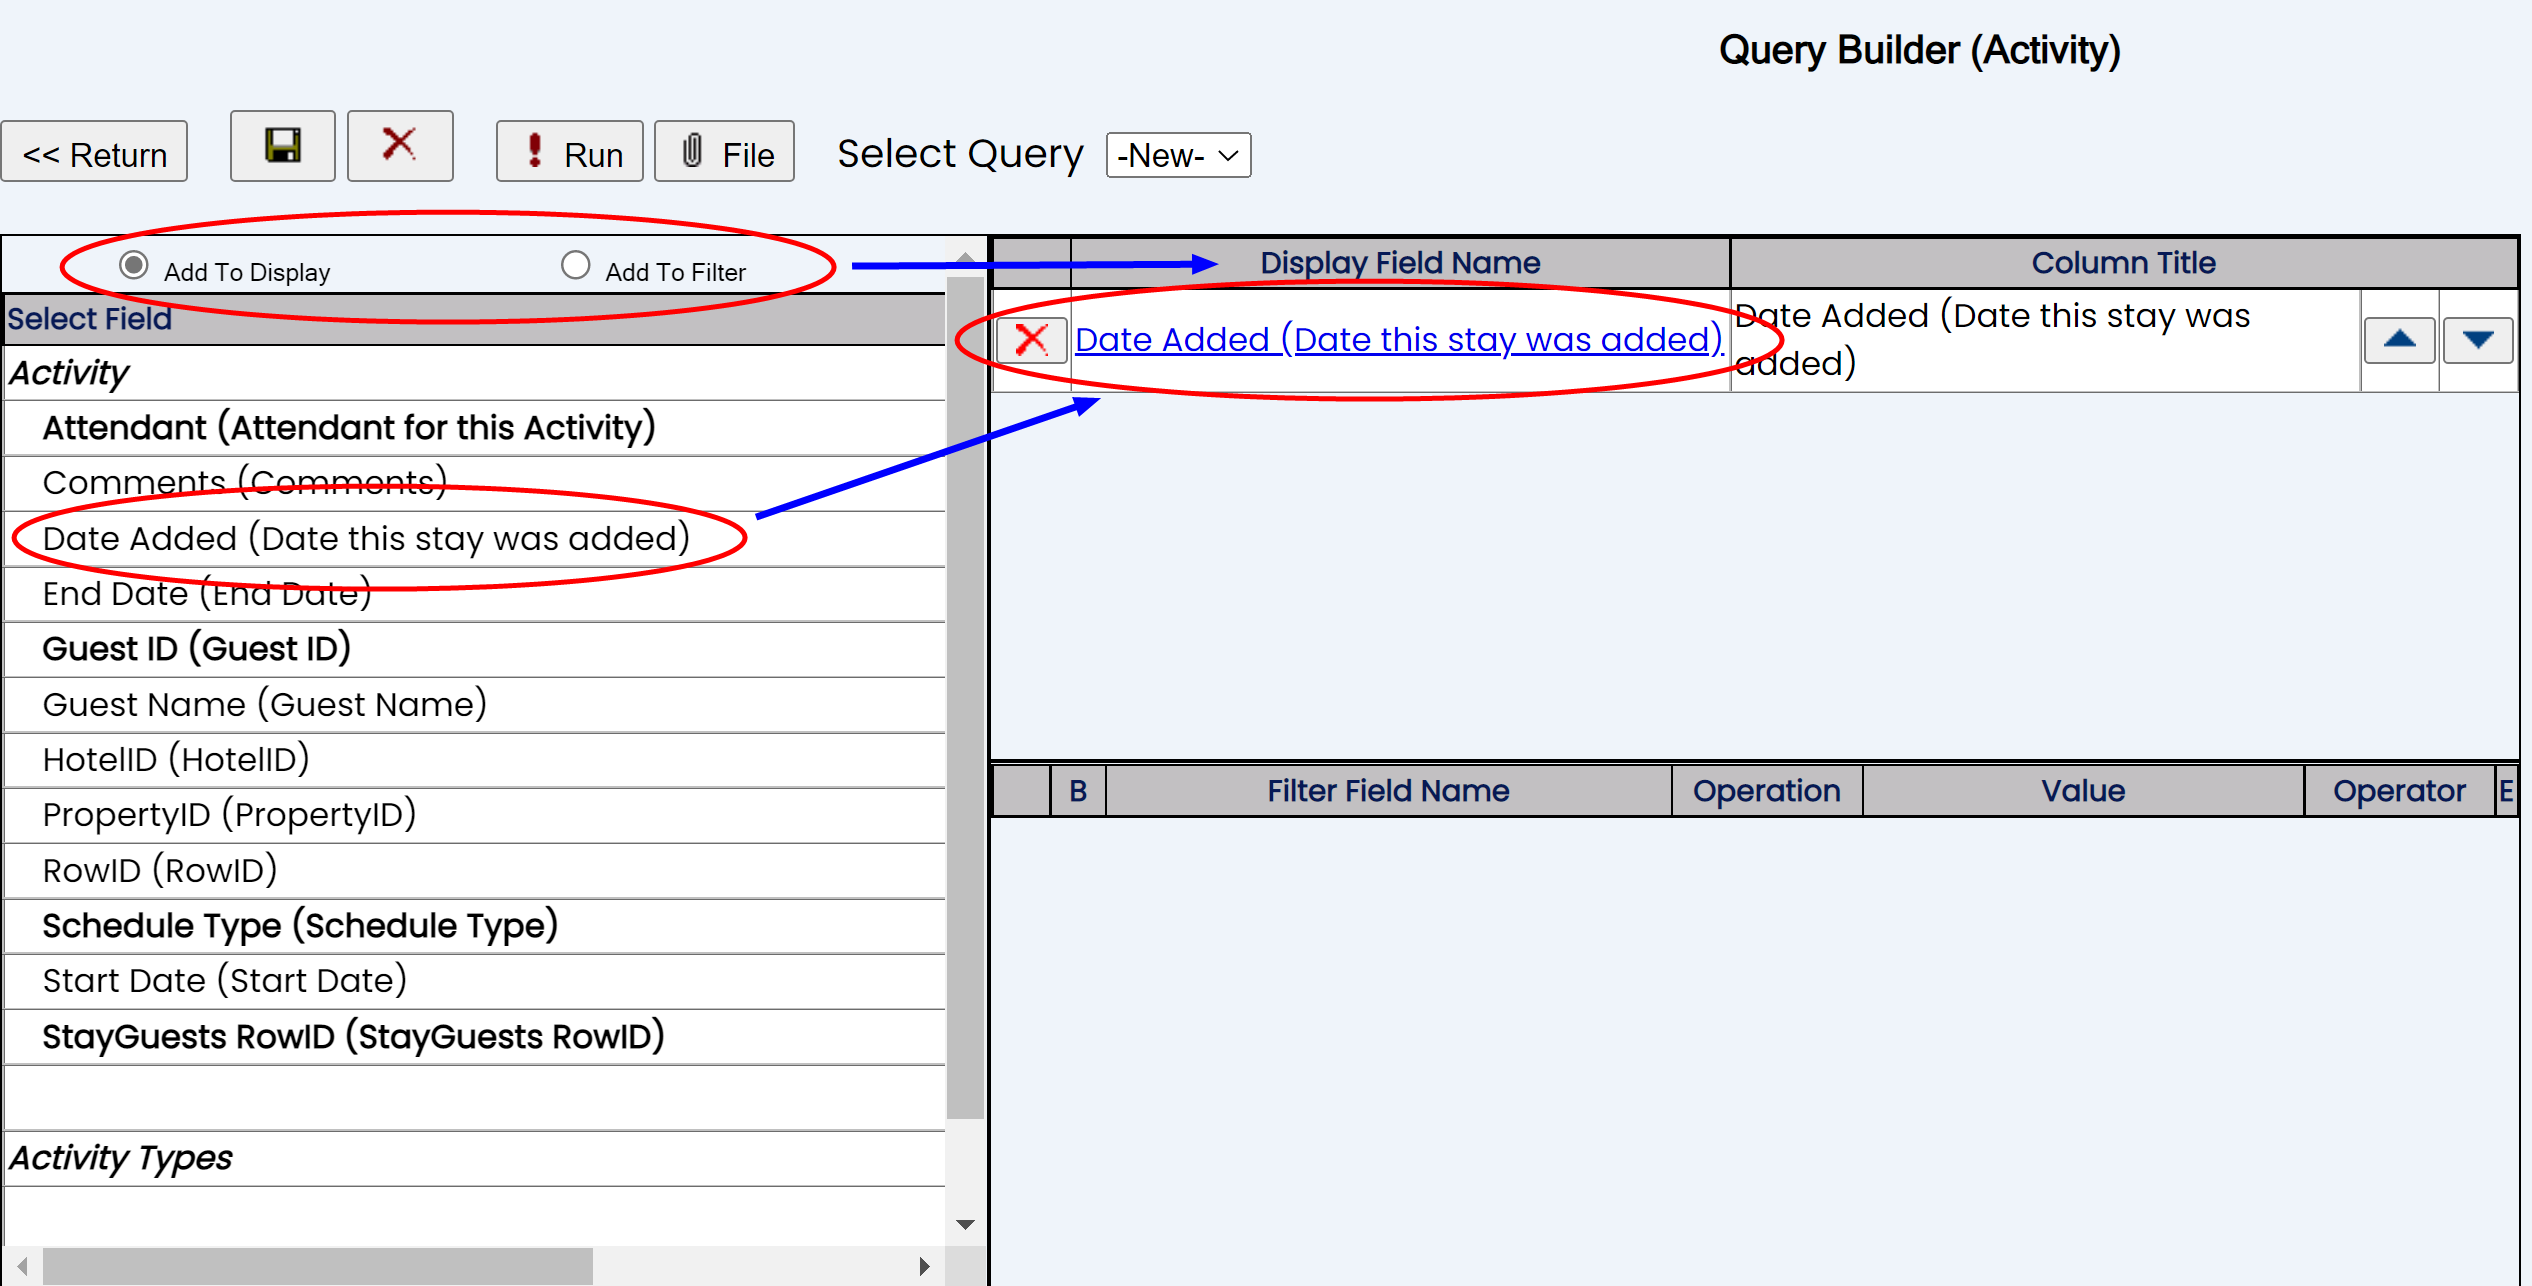
As in other Query builder screens, the Query Builder (Activity) screen has THREE main sections in a tri-pane set up. You can choose the field information on the left that you wish to include, and add it to either the Display or Filter sections on the right.
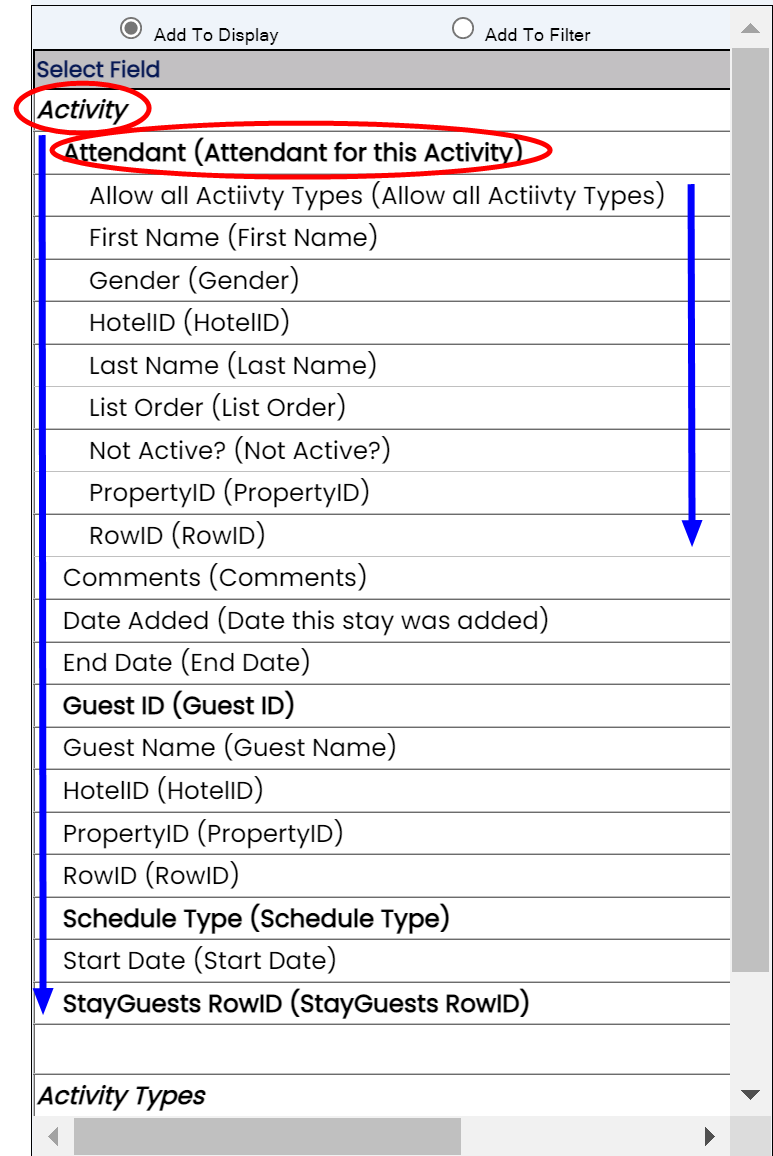
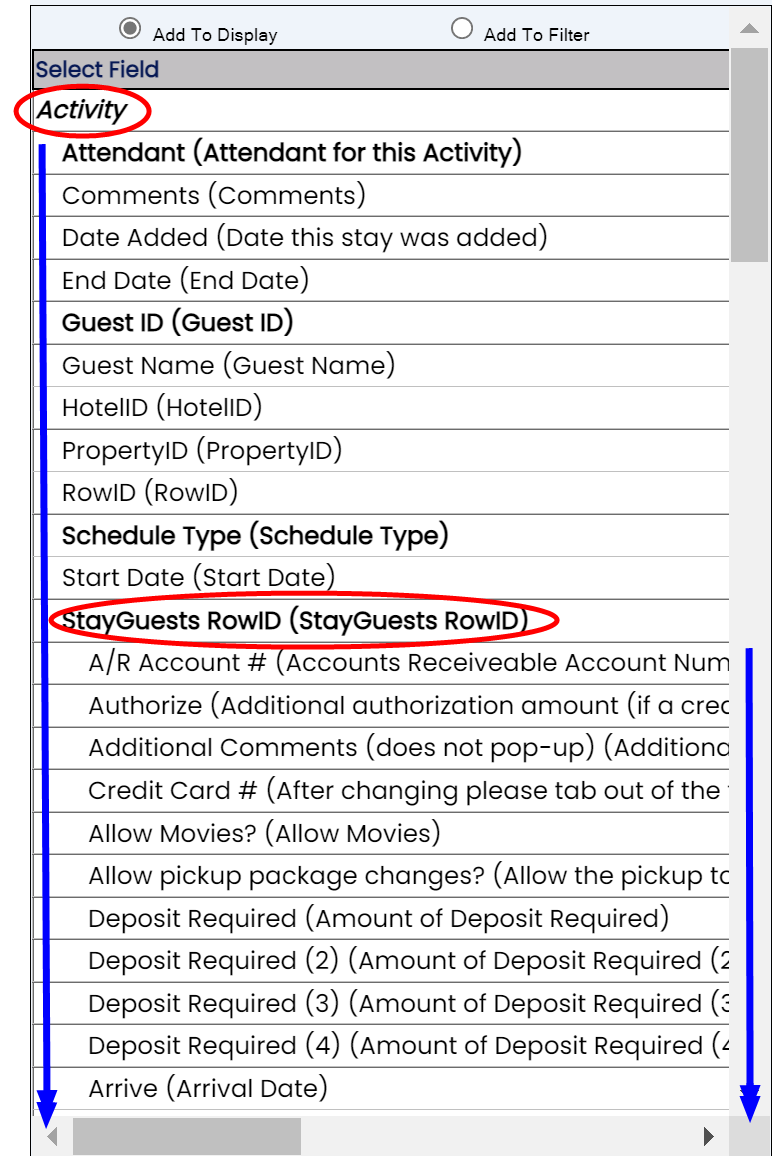
The left side displays the available fields to choose from. (This list will change based on what form the Query Builder icon was activated from). Any Fields in BOLD indicate further choice selections are available in that area. You can click ANY field in bold to expand it. These are "categories" that have several field options which will be listed directly below and slightly indented.
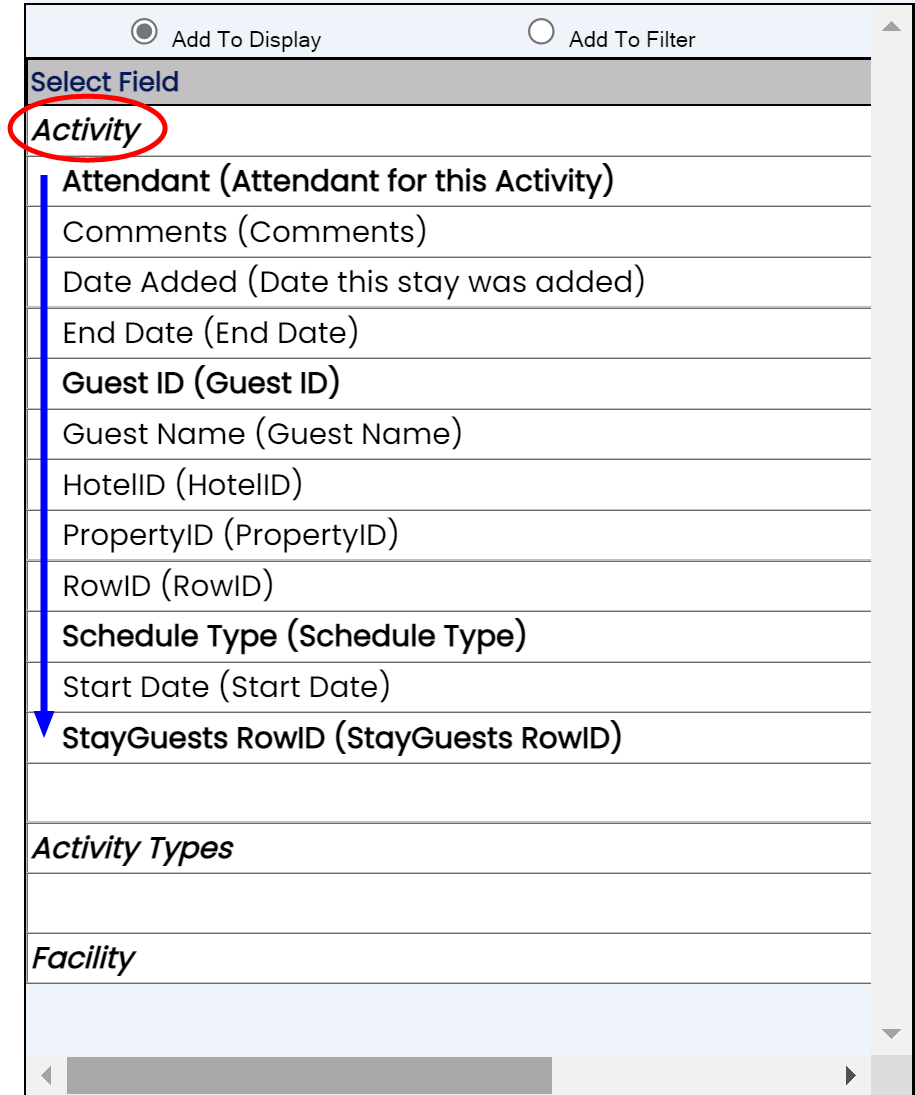
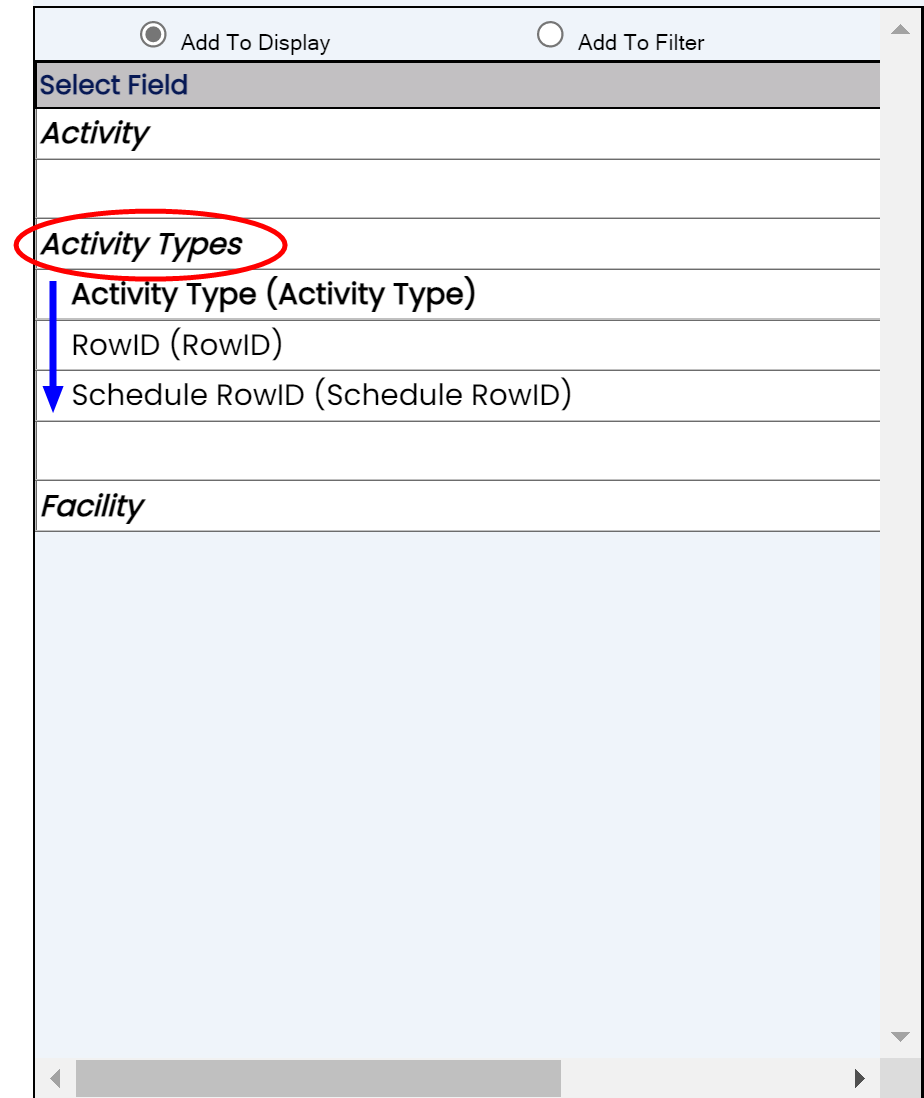
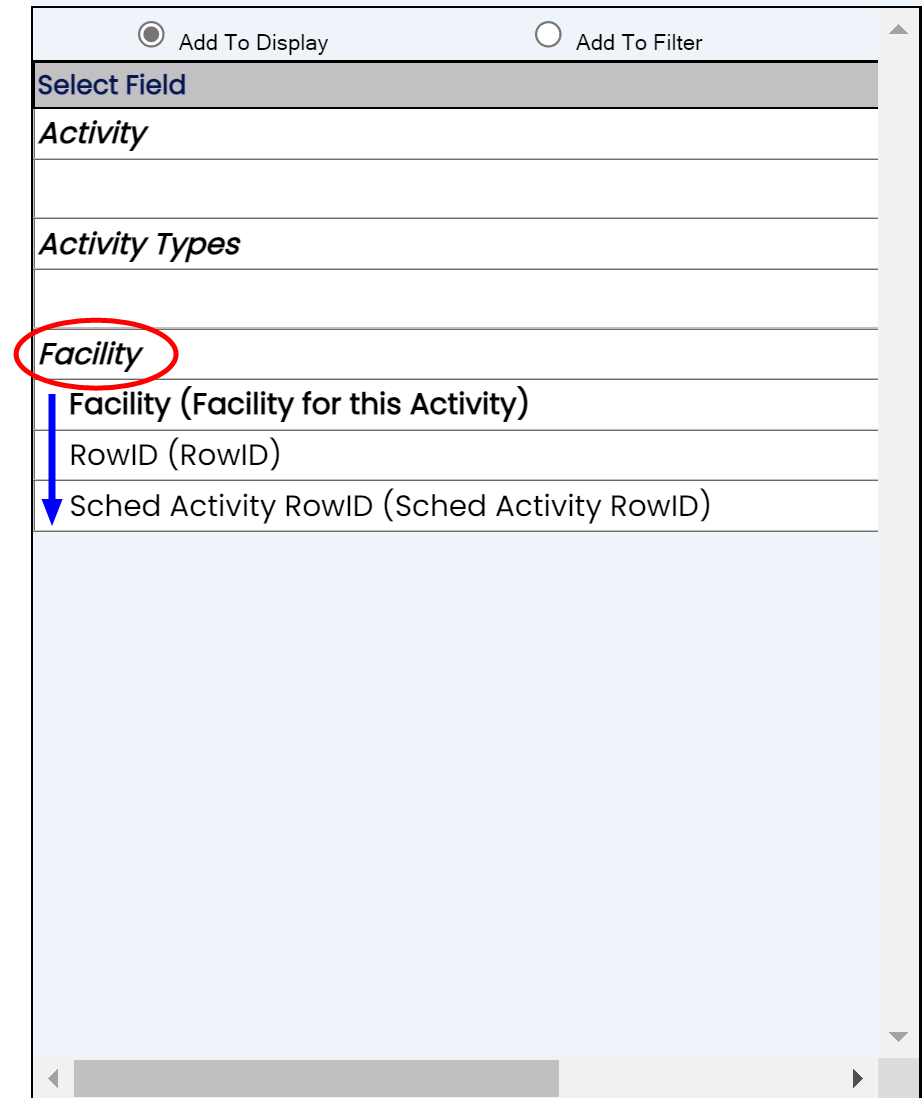
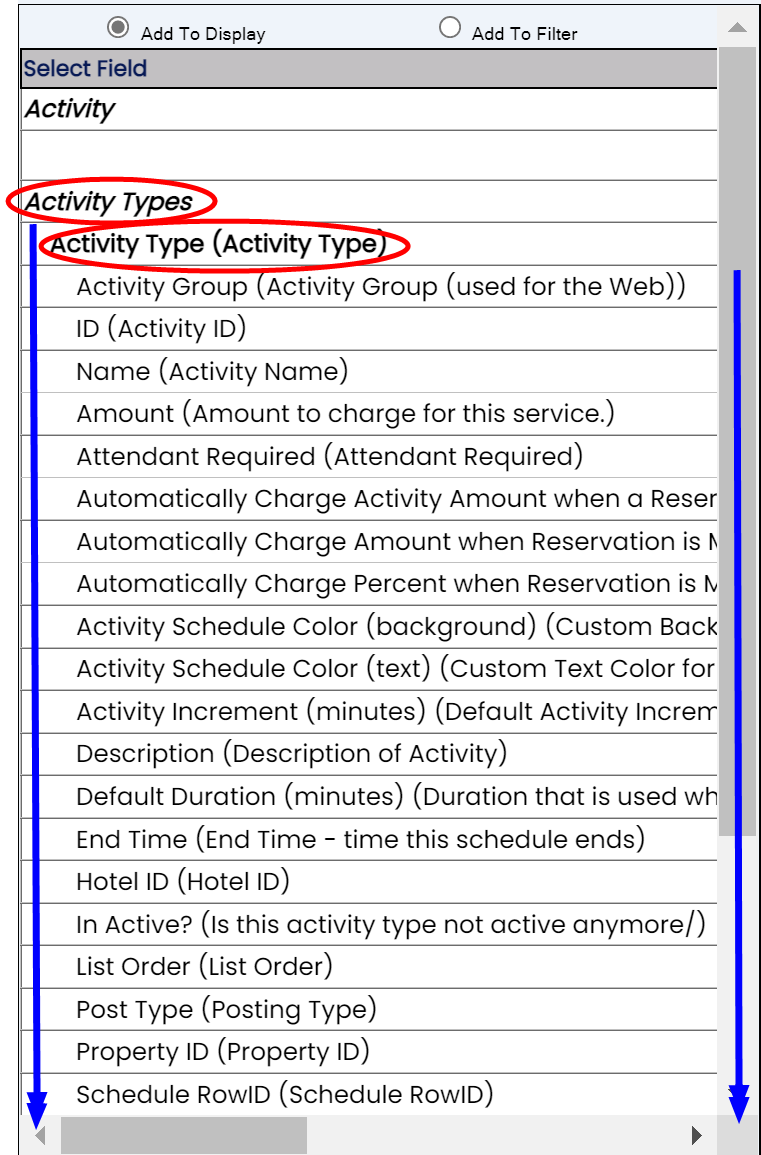
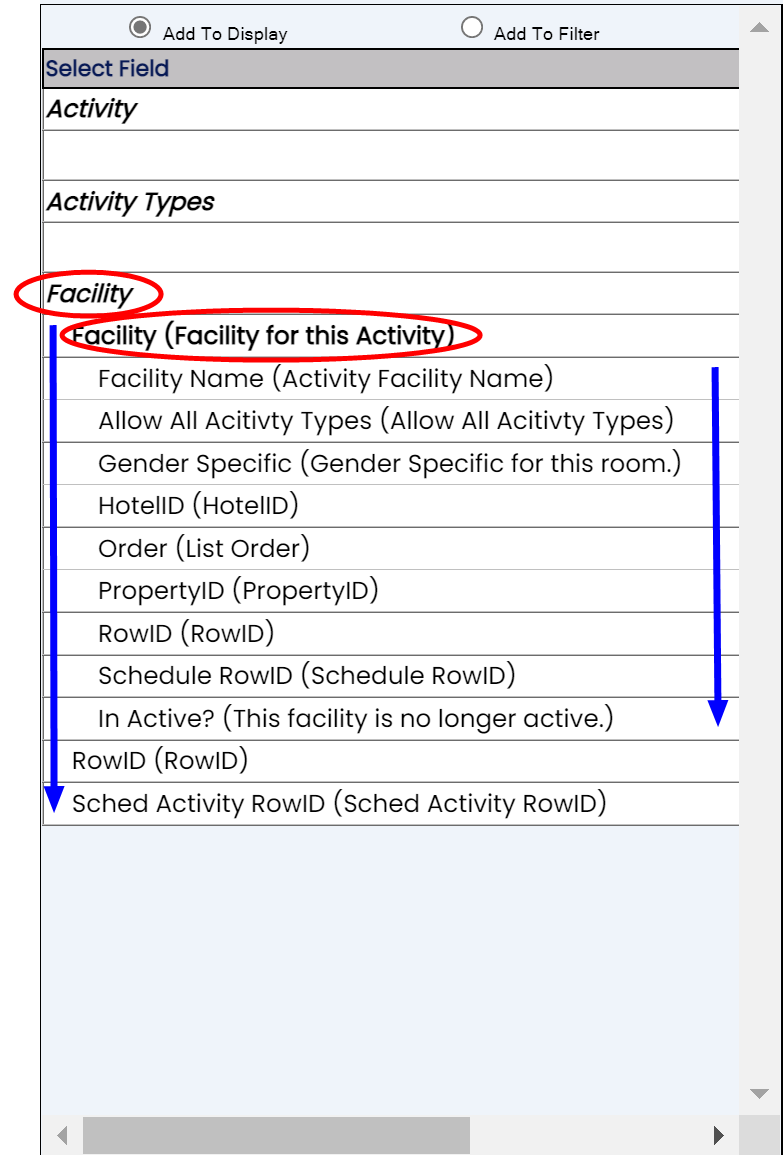
In this case, the field information available on this screen is gathered in the three categories, "Activity," "Activity Type" and "Facility" any of which may be expanded.
Note: Only one expansion may be visible at any one time. To view a different set of fields simply click another field in bold to collapse the first and expand the next for viewing.
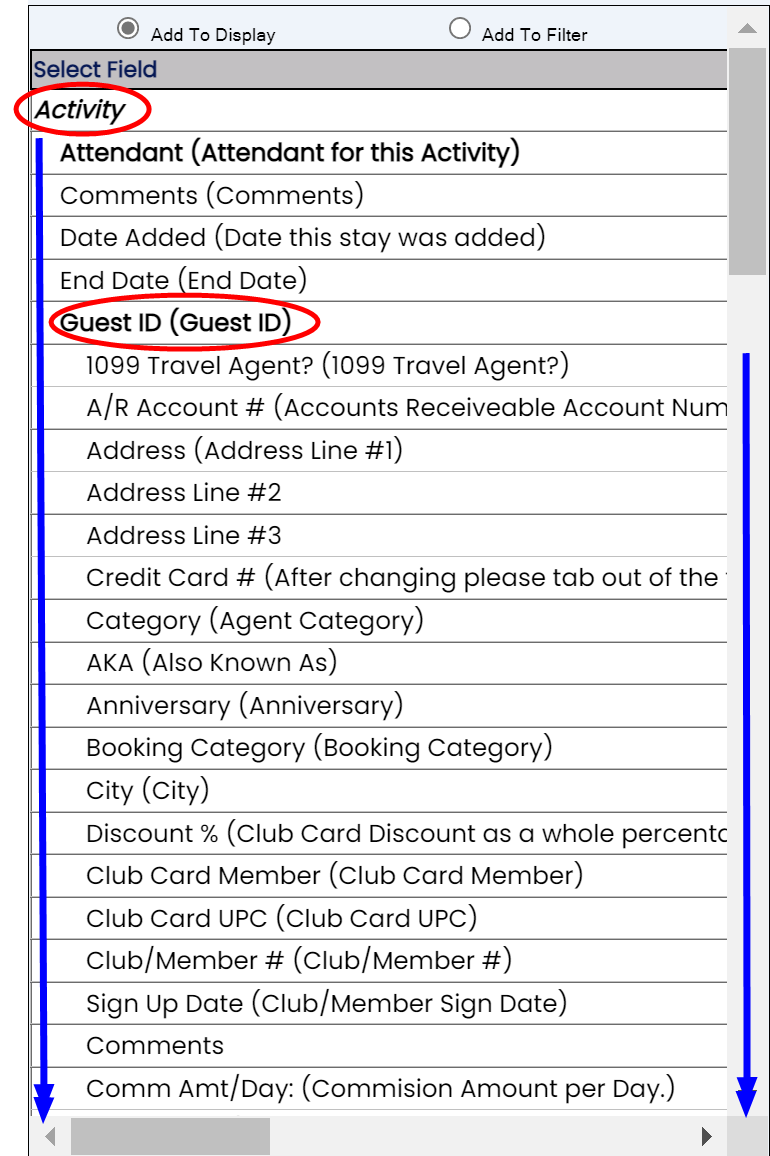
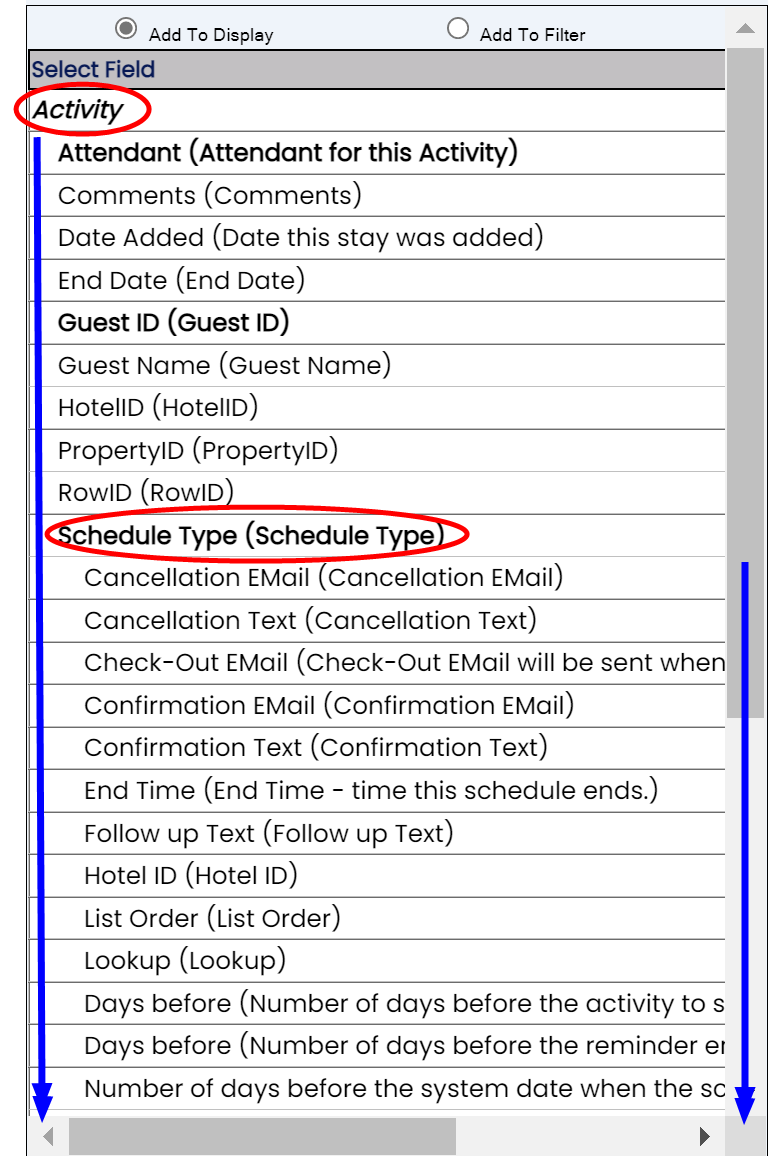
Within the three main categories, fields in BOLD may be further expanded. Again, only one expansion may be visible at any one time.
Activity: Attendant (Attendant for this Activity), Guest ID (Guest ID), Schedule Type (Schedule Type) or StayGuests RowID (StayGuests RowID) field categories may all be expanded.
Activity Type: The Activity Type (Activity Type) field category may also be expanded.
Facility: The Facility (Facility for this Activity) field category may also be expanded.
Once you have your field information selection choice displayed in the left pane (NOT IN BOLD, in regular text), you may add it to one of the panes on the right. Use the radio buttons located above the Field Information pane to determine whether you wish to DISPLAY your selection ON the report, or FILTER the report BY your selection. The Display Field Names are the "column" headings for your report. The Filter field names are the "filters" applied to the display columns.
Note: It is possible to choose the same field information for both panes, you will have to add your selection TWICE, once with the display button selected, then again with the filter button selected. Make sure to select the Add to Display box button when you are selecting Display Fields, (top right screen) and the Add to Filter box button when you are adding Filter fields (bottom right screen). You can add as many fields as you wish to either the Display or Filter panes.
Once added, click the (blue, underlined) field entry to expand the "Properties for Display Fields" or "Properties for Filter Fields" respectively, and select any properties you wish the data to have.
Continue adding Fields from the Field Information list to both the Display and Filter fields, and editing their properties, until you are happy with your report contents.
Note: Only ONE field can be open at any time; clicking on another field entry will close the currently open one and open the box for the new one. Clicking the "Save" button INSIDE the Properties box will close it down without opening another.
Save: When ready, use the save icon in the local tool bar (above the field information panel) to save the report and click OK to return to the Query Builder screen.
Once your Report has been created and saved, you can choose to either run it (generate it) or export the information in it to a new file (for use with Excel or other options).
Generate: Clicking the Run button will generate your Report IN A NEW QUERY SCREEN called Query Results for your viewing.
From here, you can click the Show button to return to the Query Builder screen where you can continue editing the contents of your report.
Export: Clicking the File button will take you to the File Output screen in the Query Builder where you can create a link to a file for you to download the data.
From here, you can return to the Query Builder screen by clicking on either the Run or File button, then clicking the Show button. This will open the Query Builder screen again, open on your report.
Note: For more detailed help on using the Query builder screen, including guidelines on ordering your data, complete lists of properties that the Display field and Filter field data may have, and troubleshooting tips, please see our Query Builder Help topic.

